


The Witcher III: Video/Graphics Tweak Guide
At the request of our great readers, we have a small update for those of you who want to make The Witcher III look better and aren't afraid to play with mods.
The original guide begins at the "Overview" section. Jump down there now if you aren't interested in mods, upgraded graphics or just want to play the game in its native form.
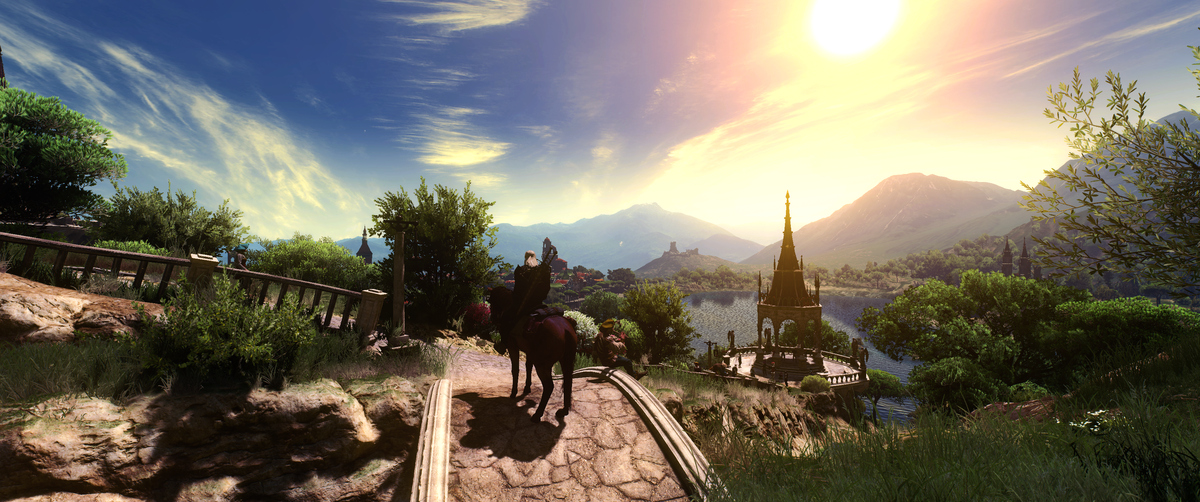
Blessed with an energetic and talented modding community The Witcher III is home to mods that will change the game in just about every way possible. For this article, we're going to focus on the graphics. Suffice to say, you can make the game look like this if you wish to. This mod includes over 1,000 improved textures and over 250 improved character models. Incredible.
Modification requires minimum a 3GB VRAM for smooth gameplay. For best results 4GB is recommended.
Possible decrease in fps are 0-5 which depend on pc spec, game settings and ingame location.
On GTX 970/AMD R9 290X and higher there should be no fps drop.
Also in some cases, modification can give smoother gameplay.
You can download the mod at NexusMods. Complete instructions on how to install, etc. are located there.
Witcher Reshade Mod is another great choice if you would like to up the look of the game. Shots like this are from players using the Witcher Reshade Mod.
Realistic Wind Effects is a mod recommended by Osama Zakarneh. This mod takes the abnormally active weather and wind effects from the vanilla game and tames them down to make them more realistic. The quote below is from the author.
This mod adjusts the heavy swinging tree effect at most weather conditions. Now the wind feels more naturally. Base game and HoS location (Toussaint is NOT included) having less wind power and a different weather frequency.
You can download this mod from Nexus Mods.
If you would like to upgrade the lighting in Witcher III then perhaps STLM or Super Turbo Lighting Mod is for you.
 You can download STLM here.
A quick search of Nexus Mods will have you changing the game in ways you probably didn't think were possible. Have fun with it!
NOTE: All content below this line was written when the game originally launched.
Overview
The Witcher III is a demanding game and one that will likely test most people's computers to the limit if you want to run it at maximum settings. Unless you’ve a powerhouse of a PC, there’s really no need to set everything to Ultra in order for the game to look gorgeous. In this video/graphics tweak guide we’ve put together optimal settings you should take to get the best framerates without compromising on appearance. I must stress however that you should update to the latest NVidia drivers. In addition, even on my system below the game doesn’t run as great as I'd hoped so don't be too disapointed if the game doesn't run at 60 fps.
My System
- i5 2500K overclocked to 4.5ghz
- GTX 770
- 16gb DDR3
- 120GB SSD
- 1920x1080 resolution
FPS ranges from 45 to 55
Graphics Presets

If you don’t want to mess around with any of the graphics settings, you can utilise the presets provides. Available in Low, Medium, High and Ultra, they’ll automatically configure your graphics. As you might expect, choosing the lowest option simply reduces just about everything: texture quality, foliage visibility and grass density. Increasing the graphics presets will slowly bump up the visual appearance of the game. Before we get started, it’s worth us taking a look at each setting and explaining what it does in the order that they appear in the menu.
V-Sync (On/Off)
For an official description: “Screen tearing is a visual artifact in video display where a display device shows information from two or more frames in a single screen draw. The artifact occurs when the video feed to the device isn't in sync with the display's refresh.” What this basically means is that without Verticle Sync switched on, you’ll notice your screen split and tear as you move the camera. Although it will significantly increase your frame rates by having Verticle Sync off, it's quite distracting to see your screen constantly tear. I'd recommend always trying to turn it on. However, dependant on your monitors refresh rate it's possible to have it turned off and not experience screen tearing.
The standard refresh rate is 60 Hz for video games. In the Witcher III you can choose with your resolution the frame refresh rate as well, which can be extremely useful. I always suggest around 60 Hz for best quality, as more than this isn't necessary and rarely noticed. If your monitor is displaying more than this, you can always change it in the monitor settings or in Nvidia control panel.
Vertical Sync requires significant processing power that can be used elsewhere.
Maximum Frames Per Second (Unlimited/30/60)
If you have V-Sync turned on, your frame rate will always be capped at 60 anyway. In this instance, I’d recommend that you leave maximum frames set to unlimited.
Resolution
This depends entirely on your monitor and I would always recommend you stick to your native resolution.
Display Mode (Windowed/Borderless Windowed/Full Screen)
This largely depends on your play preference and the speed at which you want to minimum your game. Windowed and Borderless Windowed generally allow you to zip back to your desktop much quicker than Full Screen. Neither really have an effect on your frame rate.
NVidia HairWorks
Pretty demanding on most PC’s, NVidia HairWorks attempts to create natural flowing hair on characters and creatures. On affects the entire game world, while the Geralt only setting just applies it to him. Off, as you might expect, turns it off completely. Placing the setting “on” will have a large impact on your framerate - I’d honestly recommend you set it to Geralt.
Number Of Background Characters
Officially this setting limits the number of NPC’s you’re able to see at one time. Low limits it to 75, medium 100, high 130 and ultra 150. Considering you’ll never - ever - see more than 75 characters on screen at once, just set it to low.
Shadow Quality
As you might expect, this affects the visibility of shadows and their quality. The differences between low and ultra aren’t enormous (certainly not to the point where the Witcher III is ugly) and even high versus ultra are nearly indistinguishable, especially while playing. Setting Shadow Quality to medium should save you around 5 to 10 fps without compromising on graphics.
Terrain Quality
Terrain Quality determines how quickly textures will load without needing to encounter a single load screen. Lowering the value of terrain quality enables textures at a lower resolution (1024x1024) whilst ultra places them at 2048x2048. Stationary it’s impossible to tell the difference between low and high. Even when I was sprinting on my horse, I honestly couldn’t tell any difference regardless of setting. Set it to low, forget about it and gain a few frames.
Water Quality
The difference between low and high settings when you’re swimming or sat stationary in water is barely visible. I honestly couldn’t even tell the difference. However, where water quality matters is when you’re actually swimming or on a boat. Anything below high settings disables water simulation, meaning waves really won’t react to you being there. You really should set it to high as a minimum and considering the performance cost (maybe 1 or 2 fps) it’s worth it.
Grass Density
Unsurprisingly this determines the amount of grass on the ground. At low versus high, the differences are pretty evident. Between medium and high or high and ultra, the differences are negligible but so are the frame rate differences. I’d recommend you set this to high as you might only lose 1 fps (if that).
Texture Quality
Probably the biggest impact setting out of all the graphics options, texture quality and the differences between low and ultra are so evident that I really cannot recommend enough attempting to reach medium as your standard. Even medium, despite looking fine, still has a striking impact on armor. The relief is the fact that I cannot tell the difference between high and ultra but unfortunately, the performance differences between the two are almost non existent. If you’ve a 2GB GPU I’d seriously recommend medium or high (ultra is pointless). Medium tends to do just fine.
Foliage Visibility Range
This setting determines how far into the distance you can view trees and foliage. Each setting (low, medium, high or ultra) incrementally increases the distance at which you can view these objects and the quality of them (the number of trees rendered at any one time is doubled at each detail level). As you might expect, the performance drop from ultra is significant and in all honesty, I’d recommend you avoid it. Between medium and high you’ll lose about 5 fps choosing high but gain greater shadow clarity and somewhat heavier foliage on the cusp of your vision. For the performance cost, it really isn’t worth it: stick to medium.
Detail Level
This setting actually determines things such as blood spatter and other damage created during combat. To most people it’s pretty impossible to tell the difference between any of the settings and at low, you’ll gain a few extra frames and retain the awesome visual effects.
Hardware Cursor
Technically not a graphics setting, this determines whether or not you want mouse acceleration on or off. Turning hardware cursor on disables mouse acceleration: that’s a good thing.
Post Processing
Now that you’ve customised your graphics settings, it’s time to add the sparkles. Most of the post processing effects in the Witcher III make the game look incredible. Fortunately, a lot of them are also minimal in performance cost.
Motion Blur & Blur
Both of these settings introduce a blur effect to the game. The former during combat and the latter one that’s distance or proximity related. Blur implements a radial and Gaussian blur and with motion blur is velocity-based. I’ve tried to test how much both of these effect my frame rate and I honestly can’t tell the difference. The only thing that puts me off is that the motion blur is simply too strong by default - it makes you feel like you’re in a tornado. I turn off motion blur because I dislike it but the preference is up to you.
Anti-aliasing
Unique to CD Projeckt RED, they developed their own anti-aliasing program. It functions similarly to any other by softening out jagged edges on objects. The differences between off and on are pretty noticeable so I’d recommend you turn it on. It does however impact your frame rate (a difference of around 6-7 fps).
Bloom
This post processing effect adjusts the appearance of bright lights and how they cast on surfaces. At a cost of 1 fps without Bloom turned on, you should turn it on and enjoy the visual difference.
Sharpening
Sharpening is designed to crispen the picture but I honestly can’t tell the difference between on or off. Either setting is fine and has no real effect on performance.
Ambient Occlusion
This setting adds contact shadows where two objects meet or where an object blocks light. In layman's terms, SSAO is an older method of doing this where as HBAO+ is newer and performs slightly better. HBAO+ provides a much more natural method of shadow interaction so that details aren’t over darkened. Between SSAO and HBAO+ you’re looking at around a 4 fps difference. I’d recommend you turn HBAO+ on.
Depth Of Field
Depth Of Field adds subtle out-of-focus blurring to distance objects around you. Strictly speaking, DoF has little effect on your frame rates. I’d always recommend you have it on.
Chromatic Aberration
I’ve made multiple attempts to see what this effect does in the Witcher III and I can honestly say that I’ve failed miserably. It has no impact on frame rate, and turning it on or off changes absolutely nothing. Even when motionless, I still can’t see anything. In other games the effect can sometimes be really prominent. Either option is fine.
Vignetting
Vignetting simply darkens the corners of the screen. It has no impact on frame rates and having it on or off depends entirely on personal preference. I actually like it.
Light Shafts
Probably the most important post processing effect, especially at night time, light shafts provide beautiful effects when the sunlight bursts through gaps between buildings or objects. It really is a must and the performance hit is almost non existent (maybe half a frame per second).
Final Settings
- V-Sync: On
- Maximum Frames: Unlimited
- Resolution: Native
- Display Mode: Fullscreen (Windowed Borderless if you intend to minimize often)
- Nvidia Hairworks: Geralt
- Shadow Quality: High
- Terrain Quality: Low
- Water Quality: High
- Grass Density: Medium
- Texture Quality: High (medium is also acceptable as you can’t really zoom in on your character anyway)
- Foliage Visibility Range: High
- Detail Level: Low
- Post Process Effects: Turn all of them on but turn off Motion Blur and Vignetting if you dislike the effect.
Tweaks
You can access the Witcher III configuration file using the following path:
C:\Users\USERNAME\Documents\The Witcher 3
Be sure to backup the user.settings file first. Once you have, open it with text editor (notepad is fine) and edit any of the values below. You can then save the modified file. It’s also worth making it “Read Only” which will prevent the Witcher III overriding any changes you make.
When you open the file there’s a lot of information here and some of it corresponds directly with the graphics settings you have made in game. Some of the tweaks you can make include:
Foliage: MaxVisibilityDepth, Rendering/SpeedTree and FoliageDistanceScale. Increasing these values will increase the quality but reduce performance.
Detail Levels: DecalsHideDistance, DynamicDecalsHideDistance, DimmerHideDistance, StripeHideDistance and SwarmHideDistance. All of these affect your static decals such as blood and splatter pools. Once again, increasing them will increase their output.
Grass: Pretty obvious, but GrassDistanceScale and GrassGenerationEfficiency increase the amount of grass and its distance. Ultra settings for distance scale is 1 and GenerationEfficiency has a default value of 0.075.
Shadows: There’s a fair few here that you can adjust, but he main ones are:
1. CascadeShadowFadeTreshold= [1 is Ultra] - Decrease this to improve maximum distance of shadows
2. CascadeShadowDistanceScale0= [1 is Ultra] - Increase this to improve the quality of close distance shadows
3. CascadeShadowDistanceScale1= [1 is Ultra] - Increase this to improve the quality of medium distance shadows
4. CascadeShadowDistanceScale2= [1 is Ultra] - Increase this to improve the visibility of distant shadows
5. MaxTerrainShadowAtlasCount= [4 is Ultra] - Increase this to improve the fidelity of shadows
6. CascadeShadowmapSize= [3072 is Ultra] - Increase this to improve the fidelity of shadows
7. CascadeShadowQuality= [Ultra Value: 1] - Increase this to improve the fidelity of shadows
To read the latest guides, news, and features you can visit our The Witcher III: Wild Hunt Game Page.
