


Overview
The Colossus is the "tank" of the Javelin suits, and is the brute force choice for those who like to be in amongst the action. With high amounts of mitigation, and multiple means of controlling an encounter, the Colossus is the go-to choice for large scale fights that require a damage sponge.
With the ability to wield Heavy Assault Launchers, ranging from a Flamethrower to a Railgun, the Colossus has a great deal of options for dealing massive damage. Like any Javelin, it still has the choice of two Support Gear with one - Battle Cry - providing a much needed taunt. Although the Colossus lacks the versatility of the Ranger, or the speed and prowess of the Interceptor/Storm, it more than makes up for this in its survivability.
Pros
Cons
Fairly mandatory due to it being "the tank"Little mobility
Battle Cry provides much needed control in encountersPoor aeriel prowess
Capable of massive damage through Heavy Assault LaunchersA much slower playstyle to its peers
Ordnance Launchers offer high amounts of AOE damage
Unable to move and fire most Heavy Assault weapons
An aggressive, brute force playstyle
A slower play style to all other Javelin
Shield
The Colossus, unlike other Javelin, can't jump, dash or teleport. Instead, it has the ability to lift a shield by pressing [Mouse 1]. Whether you use it on the ground, or in the air, the shield is permanent when toggled and provides an additional layer of mitigation that ensures the Colossus can withstand a large amount of punishment. The health of your shield is displayed as an arc in the center of your HUD. Once the shield is destroyed, you'll lose it and have to re-open it after a brief period.
Colossus Javelin Abilities
Heavy Smash (Melee) - Who doesn't like to punch monsters hard? Effectively using the weight of the Javelin as a means of hurting opponents, Heavy Smash knocks down foes and leaves them vulnerable to further attacks. Whether you use it from the air, or on the ground in melee range, it packs a punch. What you need to be aware of is that if you use Heavy Smash while stationary (whether on land or in the air), Colossus will hit the floor causing a tremor. It's only if you have your shield active [Mouse 1], while using Heavy Smash [V] that you'll batter an opponent in front of you.
Siege Cannon (Ultimate) - A much more focused version of the Ranger's Missile Barrage, Siege Cannon allows Colossus to clear enemies in a small radius, ensuring that those caught in a choke point suffer massive damage.
Ordinance Launcher Gear
High Explosive Mortar: Forcing the Colossus to remain stationary, High Explosive Mortar launches an explosive projectile that deals heavy area-of-effect damage to all those in its radius. The range is long, allowing Colossus to bombard enemies from afar. Just be aware that its cooldown isn't short.
- Burst Mortar: Fires a volley of smaller mortars that spread out to pummel a wider area of effect.
- Firewall Mortar: Fires a specialized mortar round that ignites a wall of flame, heavily damaging enemies that try to move through it.
- Lightning Coil: Strikes a single random target with an arc of electricity in front of the Colossus, prioritising targets with status effects.
- Shock Coil: Emits waves of electricity out from the Colossus, damaging all nearby enemies.
Heavy Assault Launcher Gear
- Heavy Cannon: Fires a large rocket in a targeted direction.
- Flame Thrower: Unleashes a continuous stream of fire to ignite enemies.
- Flak Cannon: Barrages nearby enemies with a short-range arc of projectiles.
Railgun: Devastates a single-target with a forceful and precise kinetic round, the Railgun has no splash, is slow to fire (you can't move and shoot) but deals huge damage.
- Acid Spitter: Expels an acid projectile to damage enemies.
Support Gear
- Battle Cry: Forces all enemies within a certain radius to divert their attacks to the Colossus while lowering their elemental and physical resistance.
- Deflector Pulse: Gives all nearby allies a damage-resistance buff.
Colossus Javelin Loadout
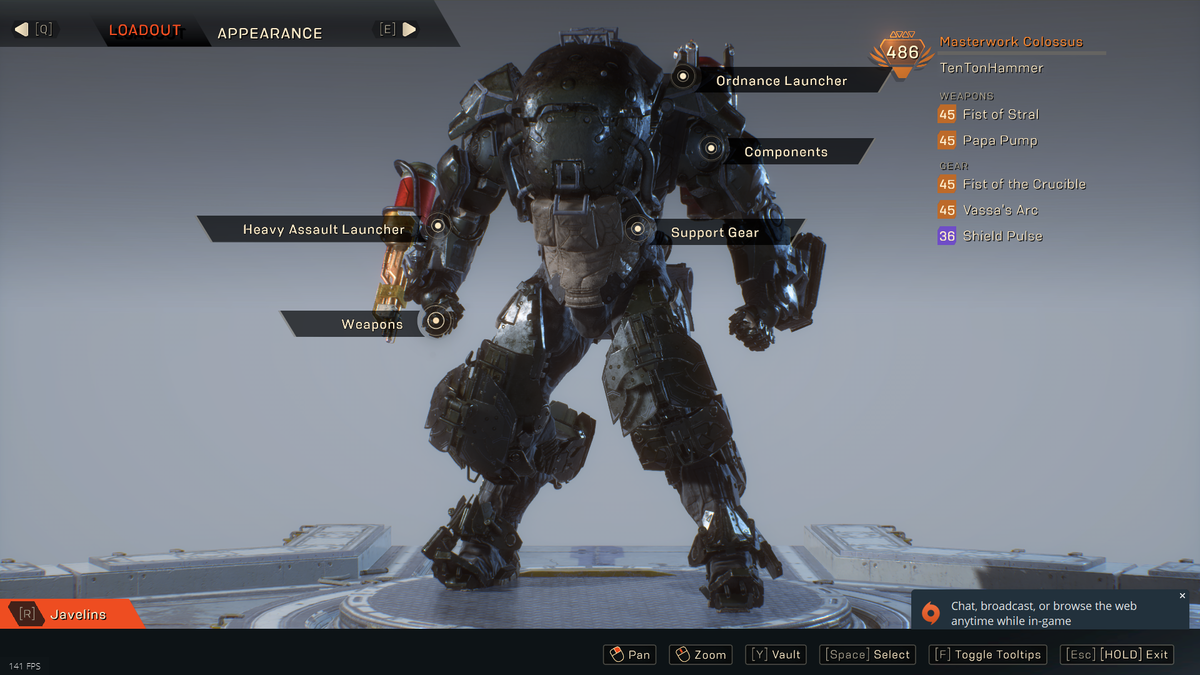
There's two builds available for the Colossus that are considered "end-game". They're both AOE and focus on clearing large groups of enemies. One is based on close-quarters, the other ranged. Both utilise similar combos, and both are incredibly potent. In most circumstances, the build I'm linking is probably best for general play, though the variable does have massive value in Stronghold's and in locations where enemies repeatedly spawn.
Components
When building your Colossus, the primary idea is to not only boost your ammo and ammo capacity, but also your combo bonus, and survivability. In most instances, the pursuit of ammo is purely because of the fact your Heavy Assault Launcher is capable of dealing enormous damage, and as long as it can fire, you don't have to automatically reach for your abilities. Despite the Colossus fulfilling the "tank" role, most of its Components do offer massive damage boosts, and if tailored correctly, see it deal huge damage.
- Catalytic Overdrive: Allowing the Colossus to gain 40% increased ability damage after detonating a combo, it's easy to maintain and near permanent when he gets rolling.
- Syncronized Frame: Killing an enemy causes the Colossus to deal 60% increases damage on his [E] for 5 seconds. Easy to maintain, but a massive boost.
- Overclocked Regulator: Building on the Lightning and Fire damage in this build, Overclocked Regulator increases the damage of both by a flat 35%.
- Colossus Combo Augment: A simple Component that increases combo damage by 50%. A no-brainer.
- Colossal Storage Augment: Increases maximum ammo capacity by 35% of base. Let the bullets fly.
- Colossal Stock Augment: Building on the above, Colossus Stock Augment increases magazine size by 35%. You can now shoot for days.
Ordinance Launcher

Lightning Coil (Voltaic Dome): Considering the Colossus can use Lightning Coil while moving, and when using Flamethrower, the Masterwork item is brilliant. Not only does it Detonate a Primed enemy, but also applies Frozen once they're hit, ensuring you can combo again with a melee attack.

Variable - Firewall Motar (Rubidium Furnace): For penning enemies back when they're continuously spawning in a single location, Firewall Mortar is amazing. Applying burning and acting as a primer, it's brilliant for softening up enemies before blowing them to bits.
Support Gear
There's only one choice for Support Gear when it comes to the Colossus, and that's Shield Pulse. The Taunt variant is awful, and the game simply doesn't lend itself to a Javelin soaking damage for a brief time. It's far easier to buff your allies with damage mitigation for a brief period, than it is to hope that enemies attack you (and you survive).
Weapons
In an ideal world, you want to be locating a Fist of Stral and Papa Pump. Both offer flexibility at different ranges, and both offer massive damage potential. With additional ammunition, Fist of Stral can fire for days, and once wound up, will gun down any enemy. As for Papa Pump, it's just a brilliant choice when enemies get a little too close, especially after hitting someone in the fact with your shield.
Heavy Assault Launcher

Flamethrower (Fist of the Crucible): The Flamethrower, compared to the Firewall Mortar provides more means of movement. The mobility, combined with its arc, ensures that it still has massive Primer potential, but also ensures that you can deal damage quickly while moving. Combined with Lighting Coil, which can be cast at the same time as you fire your Flamethrower, it's amazing for a constant one-two punch of Primer/Detonator.

Variable - Siege Artillary (Best Defence): A one-shot wonder, the Siege Artillary ability is a fire and forget that Detonates Primers. When you've cast your Firewall Mortar, it'll instantly blowup an enemies who're Primed. With its short cooldown, it's great for clearing low health enemies, or those without shielding.
Tips
1. The Colossus is painfully slow compared to other Javelin, but can survive tons of punishment. Use this to bully encounters so your team can deal damage freely.
2. Use your shield often. It's an added layer of defence that lets you soak shots, and can be used while flying.
3. You can only hit someone with a melee attack if your shield is active. If it's not, you'll simply slam the floor.
4. If flying into a fight, keep your shield up and then hit [V]. Your Colossus will plummet to the ground for a high damage AOE attack.
5. If you can, try to always keep your shield up when abilities are off cooldown, especially after using Battle Cry. Most of the time, it's best to soak damage and let your team do the work.
6. Besides your basic weapon, all of your abilities require you to stand still and launch your projectiles. While this takes some getting used to, it's typically because your abilities hit seriously hard.
7. Don't be afraid to be in the thick of a fight. Your use of a shield slam, combined with your damage, ensures you can punish and survive for long periods.
8. Your Ultimate ability allows you to deal three shots that deal ridiculous damage. Use this to clear a boss, rather than a wave of enemies.
To read the latest guides, news, and features you can visit our Anthem Game Page.
