


Overview
Blossom is undeniably one of my favorite Champions to play simply because she not only has so much utility, but she's also fairly challenging to play well. With a kit that brings stuns, zoning, AOE healing, and deflection, she has the potency to be incredibly strong in the right hands. Reliably landing Thwack! in order to slow and debuff opponents, while repositioning through her Hop and the invisbility it provides, she can be frustrating to play against.
Blossom is a happy, bubbly young faun from the Silverdeep Forest. She has left her home to investigate a disturbance in the natural order. She is always accompanied by her bird companion, Maxwell.
With only one reliable "out", however, Blossom can be incredibly fragile if she wastes Hop. A single miss with Boom Blossom (see below) will ensure she's a sitting duck and one that's easily killed. As long as you rotate your abilities correctly, you can not only survive but also harrass with relative ease. Only in 3 versus 3 do things become truly challenging for Blossom, especially against a melee heavy composition.
Updated: 25 September 2018
Pros
Cons
An incredibly versatile kit
Easily "trained" by melee compositions when Hop is on cooldown
Her Charged Thwack! is amazing for slowing and debuffing enemiesTree of Life can be killed very quickly
Hop allows her to easily reposition
Spends a lot of time having to run away
Gust is fantastic against ranged heavy compostions
Missing Boom Blossom is very punishing
Tree of Life is fantastic for zoning and absorbing damage
Needs solid aim to reliably land her Charged Thwack!
Abilities

Thwack! (LMB) - Blossom's basic attack has a fairly slow rate of fire, and requires perfect aim. With no splash and dealing fairly low damage, its value is in its "charged" state. When fully charged, the debuff of a 40% snare is enormous and ensures that she can not only escape, but also allows her and her team to attack her victim. Her charged Thwack! also pairs exceptionally well with her Boom Blossom, as if she lands her snare once the Blossom is planted, it's difficult for anyone to escape out of it, guaranteeing the stun. If you can, try not to waste your charge - it's best to use it against key opponents or to defend yourself.

Nourish (RMB) - As Blossom's primary heal, Nourish offers immediate healing, alongside healing over time. Its range is very far, the impact healing instant and with 3 charges, you can afford to be somewhat liberal with it. Just be aware that the charges return over time, and reapplying Nourish simply maintains the HOT effect: it doesn't stack. If you can, try to always keep the HOT active on yourself and any allies as it'll limit the amount of healing you need to do.
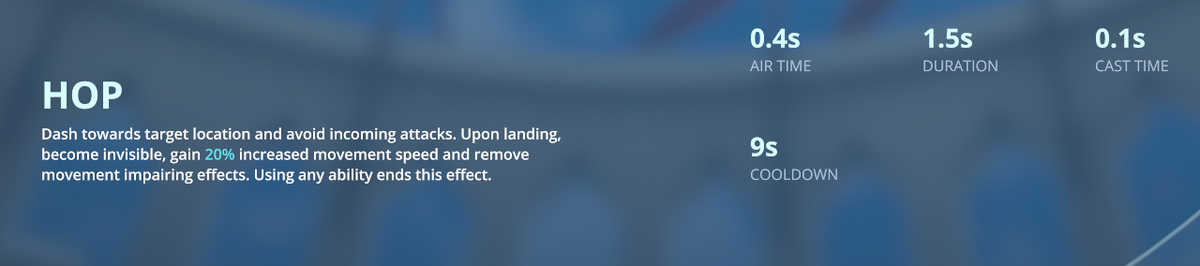
Hop (Space) - Your only means of mobility, Hop grants invisbility and movement speed while also clearing crowd control. The cooldown on Hop is long, so you cannot afford to waste it. Ideally you want to use it only when under serious pressure, and you want to use the invisbility and movement speed increase to reposition far away, or out of line of sight. At times you can use Hop aggressively to reach an opponent, but be aware this leaves you incredibly vulnerable. In 3's, it's best to use Hop to run away as far as possible to let your cooldowns recharge.

Tree of Life (Q) - The value of Tree of Life isn't immediately obvious, but it's an incredibly potent ability. Granting instant and AOE healing over 5 seconds, it's strength is in its ability to absorb attacks or to zone an enemy. Placed between you and an opponent, it grants some much needed space, allowing you to buy time, heal up and hopefully gain enough cooldowns to flee. Using the tree as a body-block often ensures enemies can't get near you, while it's fantastic at soaking up ranged shots that might otherwise cause you a lot of harm. If you can, use it to mitigate these key attacks, or when a melee Champion is up in your face.

Boom Bloom (E) - As a ranged skill-shot, Boom Bloom has two purposes. The first is to zone the enemy, the second is to stun them. If you hit an enemy directly, they are bumped back a tiny bit, allowing the delayed detonate to then stun them. Ideally you always want to be hitting an enemy directly, but be aware that it will trigger any counters your opponents are using. Like any ranged projectile, you can also cancel cast Boom Bloom by pressing C before you release the shot. This is sometimes worth doing to bait the enemy into using a defensive ability.

Gust (R) - Without doubt an invaluable tool, and probably one of the strongest abilities in the game, Gust allows Blossom to reflect any projectile sent her way. Not only that, but it also pushes enemies who're near her, backwards. Whether you're creating space, sending back a powerful projectile or simply buying a team-mate time, Gust is invaluable. In most instances you'll often use most of your Focus on Gust, especially versus ranged heavy compositions.
EX Abilities (Arena Only)

Tag (Shift + Space) - Tag is an improved version of Hop, allowing Blossom to deal high immediate damage against the enemy she hits, while knocking them back. She then retains the invisbility and movement speed bonuses her space normally comes with. For creating massive space between you and an opponent, Tag's incredibly valuable. Depending on the composition you're against largely determines what you'll spend your focus. Typically, ranged heavy: Gust. Melee heavy: Tag.
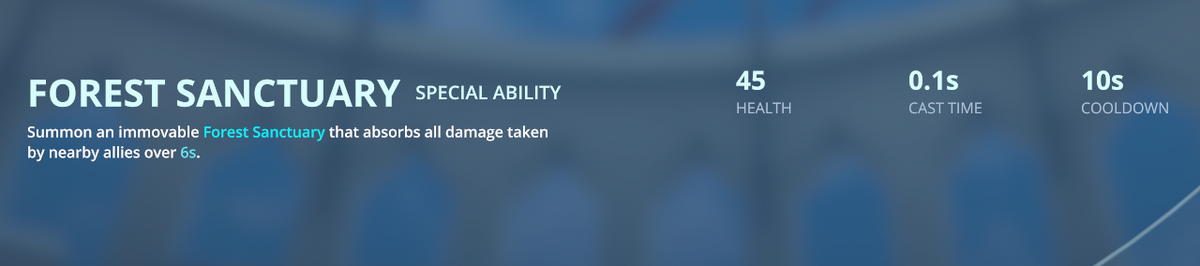
Forest Sanctuary (Shift + Q) - An ability that's perhaps overlooked by many Blossom players, Forest Sanctuary effectively allows your Tree of Life to absorb all damage you, or your allies take within its radius. While your tree doesn't have a huge health pool, you can continue to heal it with Nourish to ensure you maintain your mitigation. You want to be placing Forest Sanctuary when your Hop or Boom Blossom is on cooldown, or when your team-mate is anticipated to withstand a large amount of punishment. Just be sure to heal your tree once you place it.
Ultimate Ability

Dance of the Dryads (F) - A powerful ranged Ultimate that deals reasonable damage, Dance of the Dryads is as much about dealing damage to players as it is reducing their ability to heal themselves. The weaken, a 50% healing debuff, ensures you can cut down Support Champions with ease. If there's a downside to Dance of the Dryads, it's that it's easily identifable and can be deflected. Often you'll have to cancel it, or aim away. If nothing else, it's fantasting for stealing the central Orb.
Battlerites (Arena Only)

Gift of Nature
Blossom is vulnerable against melee compositions, so gaining a free Boom Blossom when you use Hop, thanks to Gift of Nature, is invaluable. Using Hop at the right time can ensure your assailant is stunned, while anyone following you is zoned away. You won't always stun enemies with it, but it does warn them away.
Hop and Skip!
With Blossom relying so heavily on Hop to escape, having the opportunity to leap twice with Hop and Skip! can prove incredibly useful. Although you'll lose your invisbility if you use the second leap, it does allow you to create a lot of space when needed.
Weakening Pitch
Weakening Pitch bolsters Thwack! so that it also deals bonus damage and reduces healing by 40% for 1.5 seconds. Combined with her snare (by default), Thwack! becomes incredibly powerful and allows Blossom and her team to seriously pressure a single Champion. Powerful Pitch also allows Blossom to often get the edge over most Support Champions: never a bad thing.
Nature's Cycle
Nature's Cycle increases the speed your weapon, effectively allowing it recharge every 4 seconds instead of 6. Combined with Weakening Pitch and Spring Growth (below) it ensures you always have a weapon charge available.
Spring Growth
Allowing Blossom to recharge her weapon by 50% when she lands Boom Blossom, Spring Growth when combined with Powerful Pitch and Nature's Cycle ensures she can deal high damage, with a continous application of a snare and healing debuff. With practice, it's incredibly easy to land your Boom Blossom, ensuring near permanent uptime of a charged Thwack!
Matchups
These Hero Threat Levels (1 being lowest threat and 10 being highest threat) are to help you determine which enemy Heroes can give you a headache. For the Heroes listed here, take extra care as they're particularly dangerous for Blossom.
Hero
Threat
Croak: Because he's so mobile, a good Croak is relentless and can hunt you easily: hard to land your Boom Blossom against him. 9/10Ezmo: His speed, rapid attacks, ability to shield himself and his long ranged poke makes him a headache to avoid.
8/10Freya: She's frustrating due to her shielding and ranged poke. She can also easily avoid most of your abilities.
7/10 Raigon: A well skilled Raigon can be fairly relentless and if you miss a Boom Blossom or miss-time a Hop, you're in trouble. 8/10 Rook: Berserk can mitigate incoming damage, while his stun (from Rush or Crushing Blow) can shut you down. If you miss 8/10 Ruh Kaan: His silence, pull, ranged poke and teleport can keep you permanently on the back-foot. 8/10 Shifu: A good Shifu will always be challenging, especially because of his burst, Counter and invulnerability. If you miss a single Boom Blossom, you're in trouble. 8/10Tips
This list of tips and tricks are just a handful of things we think will help your Blossom play. We'll continue to add to the list as required and if you have any tips you'd like to share, let us know in the comments below and we'll place them here.
1. Your charged weapon is signified by a green symbol. When charged, your Thwack! will cause a significant slow and deal high damage: save it!
2. Blossom has a fast projectile speed on Thwack and it's accurate, don't be afraid to constantly poke with it even if its damage isn't amazing.
3. Try to save a charged Thwack! to steal the Orb. Dealing 23 damage, it's a high amount of fast burst.
4. When your weapon is charged, your staff wil glow like the rainbow.
5. Nourish has a short cooldown and heals for a small amount over time. Just keep yourself and your team-mates topped up at all time.
6. Nourish provides a fair amount of energy (5%) so allows Blossom to quickly use her EX and Ultimate abilities if you spam it on allies.
7. You cannot move while casting Nourish, so be sure to position yourself on the edge of a fight.
8. Tree of Life will bump enemies back if you summon it between you and them. Use this space to kite.
9. Tree of Life is particularly strong in confined spaces as it blocks player access unless they kill the tree.
10. Tree of Life can be summoned even if you don't have line of sight: you can sometimes use it to block Orb steals.
11. Boom Bloom has a clear telegraph, be ready to cancel it if you think it'll be deflected.
12. You can cast Boom Bloom on the Orb to zone out melee Champions.
13. Boom Bloom will still trigger counters if you hit a Champion directly.
14. Always save enough focus for a Gust if you're against a ranged composition, just be conscious of the fact your turning circle is very slow when it's activated: face the right way before starting it up.
15. If you're under heavy melee pressure, use Tag to create significant distance between you and an opponent.
Thanks for reading our Blossom build guide. You can help support its updates by subscribing to Ten Ton Hammer. Here's the details.
Gold : $1.00 USD - monthlyPlatinum : $5.00 USD - monthlyMaster : $10.00 USD - monthlyGrandmaster : $20.00 USD - monthlyLegendary : $50.00 USD - monthlyTo read the latest guides, news, and features you can visit our Battlerite Game Page.
