


Overview
Anub'arak is one of the strongest warriors available in Heroes of the Storm. He has two stuns, a reasonable health pool and can build his Talents to sustain his health through fights: he can even Cocoon enemies to disable them completely. Although he found himself down the pecking order several months ago, recent tweaks to his kit have seen a resurrgence for him, and his win rates reflect that.
He has a lot of crowd control to disrupt the enemy and can often freely escape with very little danger. What makes Anub'arak particularly powerful is his ability to dive in and out of combat and counter mage based assassins who are on the back line. In the right hands and if also pairing with another warrior (such as Diablo or Dehaka) Anub'arak offers a level of nuisance and disruption few teams can deal with.
Updated: 21 October 2019
Pros
Cons
A reasonable health pool allows you to stay in extended fights
Locusts can help enemies heal (Thrall, Illidan)
Two sources of disruption provides heavy CC
No real mobility when Burrow Charge is on cooldown
Can build to sustain himself for long periods of time
He can't position enemies like Diablo or E.T.C. can
Reasonable damage output for a Warrior
His sustain is weaker than it once was
High mitigation against ability based heroes Best with another WarriorAbilities

Scarab Host (Trait) - For Anub'arak's trait, he spawns a beetle each time you cast an ability. As a free source of damage, the beetles will assist you in attacking Heroes as well as other priority targets. Their usefulness is not that limited however, as they can be used to block incoming skillshots, waste tower ammunition, and draw aggro from mercenaries. If left to their own devices, their damage is reasonable and acts as a mini-damage over time which adds a little extra pressure.

Impale (Q) - As your main source of crowd control, Impale can be used to initiate fights, interrupt enemy channels, or secure your escape by stunning anyone chasing you down. Due to a fairly long cooldown, this ability should not be spammed mindlessly. Pick your spots wisely to get the most out of this stun. It's particularly valuable after you've arrived at an enemy from using Burrow Charge as it's then difficult to miss with and you'll double-bump someone.
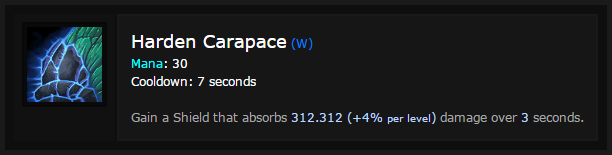
Harden Carapace (W) - This skill is part of what helps make Abub’arak an effective tank. A decent shield on a low cooldown goes a long way towards winning trades, especially early game. As your ability with the lowest cooldown and mana cost, it’s the most effective way to mitigate incoming damage and maximise your trait. Be sure to use it only when you expect to suffer damage as the shield, while significant, only lasts 3 seconds.

Burrow Charge (E) - Burrow Charge is quite flexible, as it can be used both as initiation or an escape tool. High mobility is always valuable, but you’re rewarded for using this on the offensive. When you surface, any enemies in a small area around you become stunned briefly. If you’re near an enemy and need a quick stun, you can press E immediately after descending. Given the long cooldown, make sure that if you’re using this ability to dive into a fight that you know you can get out alive. If you can, it's also worth ensuring you dive onto a high value target such as Li Ming or Jaina.

Locust Swarm (Heroic) - The damage of Locust Swarm can quickly add up over time, either shredding a squishy Hero or slowly melting the enemy team as you get in the middle of them. The healing you get back from it, in addition to your shield, means you can effectively burn down your enemies while keeping yourself alive. Its healing isn't as effective as it once was but it does provide Anub'arak with some valuable sustain. Whether he's a solo warrior or duo, it's often the go-to Heroic simply because it gives him so much more survivability.
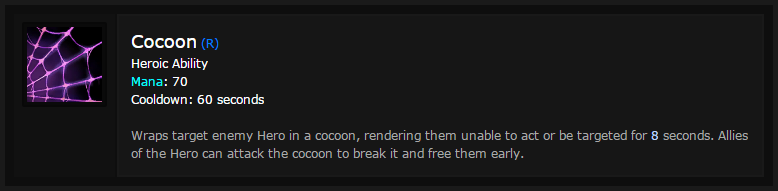
Cocoon (Heroic) - A very strong Heroic ability that will essentially remove an enemy Hero from a team fight, turning things into a 5v4 encounter for 8 seconds. This can be very effective if there’s just one Hero that your team simply can’t deal with, however, you need to remember that if they’re important enough their allies might take the time to break the Cocoon. Even if they do, it's time spent rescuing their team mate instead of attacking your team. Always try to Cocoon high priority targets such as the enemy team's support.
Talents

Level 1: Nerubian Armor
Anub'arak is unquestionably the best Warrior to deal with mage assassins (Jaina, Chromie, Li Ming, Kael'thas) so taking Nerubian Armor and having incoming ability damage reduced by 50% every 12 seconds for 1.5 seconds is significant and will keep you alive for much longer periods.
Level 4: Bed of Barbs
Anub'arak's Impale is already invaluable for disrupting enemies after he has dived in, but Bed of Barbs builds on this and allows the barbs to remain for 3.5 seconds, slowing anyone who touches them (by 30%) and deals significant damage per second.
Variable:
Level 7: Subterranean Shield
Subterranean Shield provides Anub'arak with a significant shield when he uses Burrow Charge. Whether escaping or diving, this mitigation (a little over 360 damage) is significant and provides him with a high amount of survivability.
Level 10: Cocoon
Cocoon allows you to snare an enemy in a web making them invulnerable, but unable to act for 8 seconds. Enemy Heroes can attack the web to free their comrades earlier, but for some reason people seem to completely ignore it. This buys your team considerable time to turn any fight from 5 v 5, to 4 v 5.
Level 13: Burning Rage
Purely for the continuous AOE damage and without needing to do anything, Burning Rage offers solid AOE pressure to those around him when he dives. The damage isn't enormous, but it soon adds up as he stays in a fight.
Variable: Urticating Spines allows your Harden Carapace to deal AOE damage around Anub'arak when he uses the skill, it also now deals double damage to Heroes (352). It's a fairly sizeable AOE burst, especially if you're diving against an enemy Hero and have already surfaced onto them (which also causes damage)
Level 16: Epicenter
Epicenter increases the impact radius of Burrow Charge by 60% and lowers its cooldown by 1.5 seconds for each Hero hit. Considering you'll often surface against multiple Heroes in a team fight, it's very easy to shave significant time of your key ability.
Level 20: Rewind
Having two of everything is never a bad thing. Rewind provides double Hardened Carpace and Burrow Charge. It's often too useful to giveup and allows you dive in and out of combat much more often.
Tips
This section of our guide contains a list of tips and tricks we think will help your Anub'arak play. We'll continue to add to the list as required and if you have any tips you'd like to share, let us know in the comments below and we'll place them here.
1. Burrow Charge is a great escape, but it is also Anub'arak's primary means of engage. Use it only when you can punish an enemy, or get out alive.
2. Burrow Charge will go under walls, hedges, and short distance scenary. Use this to escape when under serious pressure.
3. You can use Burrow Charge or Cocoon to interrupt Heroics and important channels.
4. Don't engage alone. You're tough, but not tough enough to 1v5.
5. Don't be afraid to dive back into a team fight once your Burrow Charge is off cooldown. The shielding is significant and will give you good amounts of early mitigation.
6. Impale is amazing at preventing players from running away so be sure to save it for retreats rather than always using it for engagement.
7. Try to save Harden Carapace for when you're activily taking damage rather than before, otherwise it'll go on cooldown.
8. Ensure you start a fight with Nerubian Armor available. It'll mitigate the first round of cooldowns that are fired your way.
9. Anub'arak excels at diving into a back-line of mage Heroes. You should constantly be harrassing them.
10. Your damage from Burrow Charge > Impale > Harden Carapace is very respectable at level 16 and will seriously hurt squishy Heroes.
11. Remember that both Burrow Charge and Impale cause a small stun upon use.
12. Always use Locust Swarm when in amongst the enemy. The AOE damage, combined with your Burning Rage, is significant.
To read the latest guides, news, and features you can visit our Heroes of the Storm Game Page.
