


Overview
Junkrat is a powerful ranged Assassin that brings a unique kit to Heroes of the Storm. While he largely plays the same as in Overwatch, his transition to the Nexus ensures he brings a great deal of value.
As he's free to fire multiple projectiles anywhere he chooses, Junkrat is in a powerful position to harass, poke, and deal damage to opponents who think they’re safe. His ability to ricochet his Frag Launcher grenades also lends itself to some high-skill maneuvers.
What’s apparent when facing against Junkrat is just how frustrating he is to deal with. His combination of AOE explosions and zoning potential in Concussion Mine and Steel Trap allows him to bombard opponents with relative ease. He can often escape thanks to the massive knock-back Concussion Mine provides, while both of his Heroic abilities offer enormous AOE damage.
In the right hands Junkrat is capable of dealing exceptional damage and even when his abilities are on cooldown - in spite of his short basic attack range - he can still deal significant AOE damage. Just be conscious of the fact that without Concussion Mine, he’s incredibly vulnerable to mobile, dive heavy compositions.
|
Pros |
Cons |
|---|---|
|
Exceptional zoning potential |
No real defence outside of Concussion Mine |
|
Frag Launcher offers fantastic harrassment |
Steel Trap takes a while to arm |
|
Capable of dealing very good damage |
His Trait only brings value when he's dead |
|
His short range basic attacks still deal AOE damage |
Frag Launcher takes practice to aim properly |
|
Excels in group encounters when enemies are clumped together |
Doesn't excel at mobile play |
Trait

Total Mayhem (Trait) - As a leaving present when Junkrat is killed, Total Mayhem deals massive damage to those around his corpse. At level 20, if all 5 grenades explode against a Hero, it deals 2850. In most instances that's more than enough damage to take someone to the grave with you, but with a minor delay before the explosion, skilled players can anticipate your death and the dropped explosives. Ideally, if you're about to die be sure to move in amongst the enemy and their team so that they take damage, or are forced to scatter.
Abilities

Frag Launcher (Q) - The number of Frag Launcher charges available to Junkrat is indicated under his health bar. With 4 free-firing shots (all of which recharge at the same time), the grenades will instantly explode upon contact with an enemy, or reaching their maximum distance. If you can, it's well worth hitting the Try Mode to practice Frag Launcher without cooldowns, as understanding the firing mechanism and the bounce/richochet mechanic can take some getting used to. It's important to remember that the final point on the telegraph is the landing destination, and the beginning of it is the first bounce. As a linear projectile, your fired grenades are easily avoided but can be fired quickly, allowing you to bombard an area with back-to-back attacks.

Concussion Mine (W) - As your only form of defence (Steel Trap is fairly easy to avoid), Concussion Mine can be thrown and instantly detonated to knock you and all enemies back. When cast, you detonate the Concussion Mine by pressing your Trait ("D"). Junkrat does not take damage when struck by his own mine, so it serves as an invaluable means of escape as the knock-back is fairly huge. If you're on the inside edge of the mine, you'll be knocked backwards. If you're on the outside edge, you'll be knocked backwards. Skilled Junkrat players can use Concussion Mine aggressively not just to disrupt opponents, but to also have one fired towards the enemy team. Cast quickly, you can often bump an enemy massively out of position so that you and your team can spike them down (ideally, onto or near a Steel Trap).

Steel Trap (E) - With a lengthy delay, Steel Trap's value is in its simple zoning potential. When Junkrat skirts around it, he's safe in the knowledge that anyone who comes near him is forced to avoid its jaws. Unsurprisingly, Steel Trap is also valuable when used in hidden areas (bushes or vents) and on an Objective (such as on Cursed Hollow). If you can, try to save all four charges of Frag Launcher so that when you do root an opponent, you can instantly unload all four grenads against them - followed by a Concussion Mine.

RIP-Tire (R) - Junkrat is vulnerable while steering RIP-Tire, so it's important to cast it at a safe location. With the ability to jump over terrain by pressing "Q", you need to quickly reach your target(s) and detonate the tire before it expires. It's also important to note that RIP-Tire can be killed by opponents, especially if they instantly focus it with rapid basic attacks. If you can approach enemies from a location they aren't anticipating, through use of its jump, you can often snag multiple players at once. Be sure to detonate RIP-Tire as soon as multiple players are in its radius, ideally with several as close to the tire as possible.
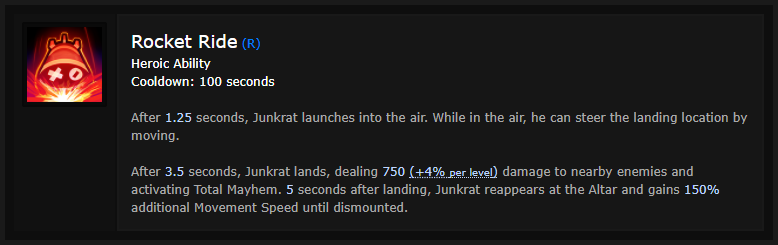
Rocket Ride (R) - My preferred Heroic simply because it's far more reliable than RIP-Tire, Rocket Ride allows Junkrat to remove himself from play, ride down on enemies from above, and deal massive damage to those in its radius. After the impact damage, Junkrat activates his Trait for even more damage to anyone left in its vicinity. Although Junkrat reappears at the Hall of Storms when having activated his Heroic, he gains significantly increased movement speed, allowing him to zip back in no time (often in a better location). If you can, try to always charge Rocket Ride early and land on the enemies back-line for maximum
Talents

Level 1: Put Some English On It
Put Some English On It allows Junkrat to gain 50% increased travel distance of Frag Launcher. Allowing him to bombard from much further away, the increased distance allows Junkrat to poke with ease, without fear of being dived by the opposition. It's also particularly powerful on Battleground's which require Objective interaction, such as Cursed Hollow or Towers of Doom.
Level 4: Taste For Explosions
Due to Junkrat's reliance on Frag Launcher for the majority of his damage, Taste for Explosions is a no-brainer. Allowing Junkrat to increase its damage by 0.50 for every grenade he lands against a Hero, the total bonus is significant (especially considering he has 4 grenades available).
Variable: If after pure zoning potential, take Gotta Trap 'Em All! The Quest Talent allows Junkrat to gain 3 charges of Steel Trap after rooting 8 Heroes. When fighting over an Objective and if Junkrat gets there first, three Steel Traps proves incredibly powerful.
Level 7: Tricky Shuffles
Due to Junkrat's lack of mobility without Concussion Grenade, and considering the fact he often unloads all his grenades from Frag Launcher incredibly quickly, the movement speed bonus of Tricky Shuffles is significant. 15% doesn't sound a lot, but it allows Junkrat to reposition with speed, escape most Heroes and generally cause more of a nuisance between his Frag Launcher down-time.
Variable: If you've taken Gotta Trap 'Em All! (4), grab Big As here. Three Steel Traps that have a 50% larger radius, and which deal 50% increased is a huge amount of AOE zoning pressure.
Level 10: RIP-Tire
RIP-Tire does leave Junkrat vulnerable, but it's the best of his two Heroics. Offering high damage, an AOE knockback and dealing enough pain to wipe any team that's low health, it's undeniably strong. Ideally, use RIP-Tire as late as possible, and at maximum distance to not leave yourself exposed.
Level 13: Bogged Down
Bogged Down allows Junkrat's Concussion Mine to slow all enemies hit by 60% for 2 seconds. Considering the distance Concussion Mine knocks enemies back, it buys Junkrat and his team significant time before the enemy arrive back into a fight. Bogged Down is also fantastic when you knock an enemy Hero into your team: the slow almost certainly ensures their death.
Variable: If you've taken Steel Trap Talents at 4 and 7, choose Chattering Teeth. Your multiple empowered Steel Traps will now chase enemy Heroes down who get close to them: very annoying to deal with.
Level 16: Endless Nades
Endless Nades provides Junkrat with the ability to lower the cooldown on his Frag Launcher by 1.5 seconds every time he hits a Hero. Considering a single grenade can hit multiple Heroes, and trigger the effect, it ensures Junkrat constantly has Frag Launcher (as long as you can aim!).
Level 20: Cannonball
Variable: Cannonball! provides an increased explosion radius on your basic attacks and Frag Launcher, and ensures you can pressure players without automatically landing all your attacks against them.
Tips
This list of tips and tricks are just a handful of things we think will help your Junkrat play. We'll continue to add to the list as required and if you have any tips you'd like to share, let us know in the comments below and we'll place them here.
1. Always ensure that when you're about to die, you hug an enemy Hero. You want your falling explosives to deal some damage to them.
2. Junkrat can move and cast all his basic abilities: you don't have to remain stationary.
3. Although it doesn't state it, Junkrat's basic attacks deal 100% AOE damage. This makes Junkrat amazing for clearing waves - don't waste your Frag Flauncher's grenades.
4. Frag Laucher and its grenades all return at the same time. Be sure to expel all your grenades before the recharge timer.
5. With your Frag Launcher grenades exploding against the first enemy hit, try to always have them bounce over the enemy front-line so that they hit the back.
6. The number of Charges available in your Frag Launcher are displayed under your health.
7. Sometimes it's worth slowly poking with Frag Launcher to pressure an enemy team over time. This can create a lot of pressure for the enemy team and their Support.
8. If you've an active Steel Trap, save your Frag Launcher ammunition (or some of it) so that you can land multiple grenades instantly against a target.
9. Don't forget that you can richochet your grenades from Frag Launcher. It takes a lot of practice to perfect this, but it's invaluable when picking off a Hero who thinks they're safe.
10. Concussion Mine has a huge cooldown. Don't waste it just to knock someone back just for the sake of it, as you'll be vulnerable for a fair amount of time until it's ready again.
11. It's worth saving Concussion Mine to escape enemy Heroes if you're caught out of position. The knock-back is huge and gaurentees your escape.
12. Practice knocking enemy Heroes towards you in Try Mode. If you can perfect it, you can often pick-out an enemy Hero for your team to dive on.
13. Steel Trap has a lengthy arm time, but because you can cast it while moving it's worth throwing down if you're under pressure.
14. Steel Trap doesn't have a radius indicator (I've no idea why!).
15. Try to place Steel Trap in locations where enemy Heroes are likely to walk. You want to prevent them reaching you, or from choosing routes that give them an advantage to attack.
16. If you die as Junkrat while using RIP-Tire, your tire will die with you.
17. RIP-Tire deals three fixed values of damage based on the proximity enemies are to the center of the explosion. Always try to get as near as possible to a high value target before you detonate.
18. Remember that Heroes such as Valla or Raynor can make light work of RIP-Tire if they see it coming: choose angles of attack from unexpected areas.
19. Rocket Ride provides Invulnerability for almost 2 seconds after you've jumped onboard.
20. The movement speed bonus of Rocket Ride isn't clear on the tool-tip, but the 150% movement speed bonus is on top of your base 100% movement speed (+250% movement speed).
To read the latest guides, news, and features you can visit our Heroes of the Storm Game Page.
