


Heroes of the Storm: Kael'thas Build Guide
In this Kael'thas Build Guide, we provide an overview of his strengths, abilities, talents and matchups.
Quick Nav
Overview
Kael'thas is a powerful Hero in Heroes of the Storm, not only for his damage but also for the pressure he brings through Living Bombs. Forcing enemies to spread at all times adds another thing to worry about in a teamfight. If they decide to ignore the flames, they will quickly find themselves suffering high damage. This pressure combined with his Gravity Lapse and Flamestrike, allow him to follow up on CC and burst enemies down, or peel.
Kael'thas requires strong positioning to be fully effective. Aim to be in a position where you can follow up on your tank's CC if they land it but also a position where you are out of reach of the enemy tanks when their team is there to follow up on you. You can often create this position with well placed Living Bombs. This Kael'thas build aims to give you an edge in your games.
Pros
Cons
High burst AoE damage
Very immobile
Can follow up CC or peel with Gravity Lapse stun
Requires strong positioning
Fairly large hitbox for a ranged assassin
Can empower his abilities to suit the situation
Can struggle to kill the beefier tanks
Trait

Verdant Spheres (Trait) - Activating Verdant Spheres causes your next ability to become more powerful. Considering its short cooldown, you'll have it available very often. Empowered Flamestrike is larger, empowered Gravity Lapse stuns up to 3 enemies and for longer, and empowered Living Bomb has no mana cost or cooldown. Each ability can be empowered to suit different situations. Empowering Flamestrike can allow you to hit unhindered enemies or multiple grouped enemies. Empowered Living Bomb can allow you to keep Living Bomb on enemies much more often, forcing them to play around it at all times. It can also allow you to drop 2 Living Bombs when the fight erupts. Empowering Gravity Lapse can allow you to stun an enemy that is behind other enemy units, such as other heroes or minions.
Abilities
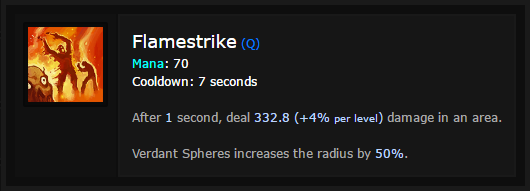
Flamestrike (Q) - Flamestrike is a powerful AoE ability that deals high damage in a fairly small area. With Verdant Spheres activated the radius is increased by 50%. A normal Flamestrike is great for clearing waves with a free Living Bomb or following up on CC. Empowering Flamestrike can allow you to hit unhindered enemies or multiple grouped enemies. As the game progresses into the later stages of the game you will likely be empowering this ability more. This will be partly due to your talents such as Ignite at level 16, and partly because of the increasing need to be further from the fight to avoid the enemy CC.

Living Bomb (W) - Living Bomb applies a damage over time effect onto a player that once expires, detonates and spreads Living Bomb to enemy heroes that were hit by the explosion. Combined with Verdant Spheres, you can use Living Bomb every 6 seconds (if you always empower it). This can force enemies to spread for 50% of the time, adding another deadly thing to worry about in hectic teamfights. Keeping Living Bomb active on the enemy frontline can allow you to stand closer without the enemy backline being able to step up and hit you without risking catching the Living Bomb. When the fight erupts, dropping two Living Bombs can force enemies very far from each other while your team looks for a kill.

Gravity Lapse (E) - Gravity Lapse stuns the first enemy it hits for 1 second. If you empower it with Verdant Spheres it'll stun up to 3 enemies and increases the duration by 50%. This is a great ability for following up on your team's CC or peeling enemies off of yourself or allies. Empowering Gravity Lapse can allow you to stun enemies hiding behind a few minions or their tank. It can also be empowered just to keep them in the air a little longer to allow your team to finish them off if your own damage is lacking either due to positioning or cooldowns.

Phoenix (R) - Kael'Thas can launch a Phoenix at a target area, causing the flaming bird to deal damage to enemies along its flight path but also when it lands. Its attack radius is large and because of that, it's great for area denial or continued pressure during a group fight over an objective. Placed on an objective or in a location where you're fighting, the Phoenix will zone out enemies players or deal serious damage to those who stay in its radius.
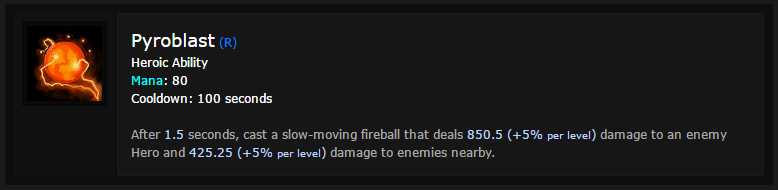
Pyroblast (R) - Pyroblast allows Kael'thas to send a flaming projectile to a single target. The slow moving spell deals huge damage and on impact will also cause splash damage to those nearby. This can add a ton of damage to the kill target or force high priority targets out of the fight as they wait to be healed. If you miss an opportunity to use it earlier, it can also execute fleeing enemies. Remember to keep in mind mitigation such as Uther's Divine Shield, Ice block, or Spell Shield.
Talents

Level 1: Mana Addict
Mana Addict not only improves mana sustain but also allows him to obtain Arcane Barrier once he has collected 20 Regeneration Globes. Make sure you are grabbing Globes when you can but don't stress too much if you cannot finish the quest instantly. This allows Kael'thas to create a shield equal to his maximum mana when he needs it. The shield gives Kael'thas a huge boost to survivability, allowing him to negate a ton of damage.
Level 4: Netherwind
Netherwind increases the range of Gravity Lapse and also refunds mana when it hits an enemy hero. The extended reach on Gravity Lapse allows you to easily follow up on CC without putting yourself in danger. This will be very important later in the game where you are very vulnerable to enemies catching you.
Level 7: Sunfire Enchantment
Sunfire Enchantment allows Verdant Spheres to also empower Kael'thas's next two auto attacks, increasing their damage and also making them deal spell damage. If both empowered auto attacks hit enemy heroes then Kael'thas gains 15% spell power for 10 seconds. This can be great for adding a little more damage to the kill target as well as passively increasing your damage slightly.
Alternative - Burned Flesh (for when you you don't want to auto attack heroes)
Burned Flesh is a great you can consistently hit multiple heroes with Flamestrike. This can easily be achieved through heroes with displacements such as Garrosh or Alarak. The extra damage is huge but it can often be difficult to see consistent value.
Level 10: Phoenix
Providing amazing area denial with a relatively low cooldown, Phoenix is amazing for zoning out the enemy players. Any enemies who fight in it will take substantial damage. Even in large areas where you cannot fully zone out enemies, Phoenix can be used to force enemies into a smaller area where it is much more difficult to avoid your AoE abilities.
Alternative - Pyroblast (for when you want to see one big damage number)
Although Phoenix has great area denial, Pyroblast is a good alternative against some compositions. This can add a ton of damage to the kill target, allowing you to burst even the tankiest tanks very quickly. It can also be used at the beginning of a fight to zone a high priority target out of the fight. Just be aware that if the enemy team has certain healers such as Uther or Kharazim or certain abilities such as Ice Block or Spell Shield, they'll be able to mitigate the damage.
Level 13: Pyromaniac
For every tick of Living Bomb, Pyromaniac reduces your ability cooldowns by 0.5 seconds. Considering you can have Living Bomb ticking on enemies for 50% of the time, this can greatly reduce your cooldowns, keeping you active.
Level 16: Ignite
Ignite allows Flamestrike to apply Living Bomb to an enemy hero hit (always the hero closest to its center). This adds a ton of damage and cooldown reduction (Pyromaniac talent). It also increases the amount of Living Bombs you can have active, forcing enemies to spread even more.
Alternative - Fury of the Sunwell (for when you just really like Flamestrike)
Fury of the Sunwell allows Flamestrike to explode in the same area twice, 1.5 seconds later. This can add a ton of damage if your team has enough CC to keep enemies locked down for 2.5 seconds. It can also be great for attacking enemy buildings or certain objectives such as the Immortals on Battlefield of Eternity.
Level 20: Flamethrower
Allowing you to cast Flamestrike from a 40% increased range, Flamethrower also allows you to reduce Flamestrike's cooldown by 4 seconds if you hit 2 enemy heroes. Combined with Pyromaniac, you can cast Flamestrike far more often at incredible range. This allows you to play very safe, standing very far back while still dealing high damage.
Matchups
These Hero Threat Levels (1 being lowest threat and 10 being highest threat) are to help you determine which enemy Heroes can give you a headache. If a Hero is listed here, take greater care to play around them.
Hero
Threat
Anub'arak: His dive, shielding and stun can make life incredibly miserable for Kael'thas. A well skilled Anub'arak can force many alleis to have to peel him off of you. 9/10 Genji: His mobility, Deflect and ability to leap into the backline makes him a very difficult hero to deal with. Rely on your team to peel him off of you as it will be very difficult to land Gravity Lapse on a strong Genji. 9/10 Maiev: Her Umbra Bind can quickly pull you to a horrible position if she catches you. Play safe until you see her use Spirit of Vengeance9/10
Valeera: Her silence and burst will leave you little options to survive alone. Stay near your team and rely on them to keep you alive until the silence wears off. 9/10 Zeratul: He can deal a ton of damage to you if you are too far from your tanks. Stay close to your frontline and let them deal with him when he jumps in.9/10
Tracer: Her speed and Pulse Bomb can quickly chunk you. Save Gravity Lapse for if she gets too close or your team lands CC on her. 8/10 Kerrigan: Staying out of her range is important because if she catches you with Primal Grasp into Impaling Blades you should die assuming the enemy team can follow up.7/10
The Butcher: He can deal incredible damage to you if you miss your Gravity Lapse. Time Gravity Lapse so it is still traveling through him as he hits you to stun him after he stuns you, giving you a chance to walk away after.6/10
Tips
This list of tips and tricks are just a handful of things we think will help your Kael'thas play. We'll continue to add to the list as required and if you have any tips you'd like to share, let us know in the comments below and we'll place them here.
1. It's important to choose your use of trait depending on the situation. Early game when you can step closer to enemies, keeping Living Bomb active more can keep enemies in check. Later game, empowering Flamestrike can allow you to play safer. At any point in the game, empowring Gravity Lapse can allow you to stun enemies hiding behind their allies.
2. Empowering Living Bomb is great for clearing minion waves and camps cheaply and quickly.
3. Against a dive heavy composition, empowering Gravity Lapse can shut down a dive completely. It'll buy you plenty of time to reposition and bring the heat.
4. Flamestrike deals the same damage whether you empower it with Verdant Spheres with it or not. Empowering it only increases its size.
5. When aiming Flamestrike at unhindered enemies, try to ensure that you use Flamestrike in a location where you think players will move to, rather than where they currently are. For example, when they're running back to base aim at their gates rather than their feet.
6. Flamestrike can be used to zone enemies away from a point. If you see the enemy tank land a stun, drop a Flamestrike where the enemies need to walk to be able to attack your CCed ally. This can force them to back off and will help your ally who was CCed or they will suffer damage trying to follow up on their tank.
7. When enemies die affected by Living Bomb it explodes. This can be useful for clearing minion waves or surprising enemies with a Living Bomb on a minion that is about to die.
8. Use Phoenix to siege a structure when your team are pushing, or to defend and zone a location. Its power is in its ability to keep enemies from entering an area.
9. Phoenix has a fairly short cooldown and lasts 7 seconds. Don't be afraid to toss it if you think it will deter enemies from impeding your game plan.
10. Positioning is very important as it allows you to not only stay safe, but also allows you to land Gravity Lapses, allowing you to follow up CC.
Thanks for reading our Kael'thas guide. You can help support its updates by subscribing to Ten Ton Hammer. Here's the details.
Gold : $1.00 USD - monthlyPlatinum : $5.00 USD - monthlyMaster : $10.00 USD - monthlyGrandmaster : $20.00 USD - monthlyLegendary : $50.00 USD - monthlyTo read the latest guides, news, and features you can visit our Heroes of the Storm Game Page.
