


Overview
Rehgar is a mobile and powerful Support Hero. His chain heal is good and as the game goes on, your healing potential gets stronger and stronger. Ghost Wolf allows him to quickly get in and out of fights, while his Lightning Shield can offer a considerable damage boost. He's undoubtedly one of my favourite support Heroes and even his popularity has remained consistent: he's never far from top tier. Careful management of your mana, combined with use of your Totem to body block and control the enemy team sees Rehgar have a high skill ceiling. The major downside to him is that as a melee Hero, it's difficult to be on the front line. That said, clever positioning and only diving in when possible ensures Rehgar brings a great deal of value to any team.
Guide Updated: 2 December 2019
Pros
Cons
Amazing mobility
Mana hungry early game
Strong healing power that can keep any team alive
Can be focused to prevent him using heals and/or Ghost Wolf
Ancestral Healing is incredibly useful
His melee playstyle can leave you vulnerable
His Totem is great for coordinating spikes to prevent players escaping
He lacks some of Lucio and Auriel's utility
Trait

Ghost Wolf (Trait)– Rehgar’s Trait replaces the traditional mount. It's slower than a true mount, but allows him to transform instantly and gain the movement speed buff quicker than anyone else. It also allows Rehgar to deal 75% increased damage when he attacks as a wolf. This attack will cancel Ghost Wolf, but should be used during an all-in on an enemy Hero anyway, or to take down minions or merc camps more quickly. If you can and because the spike from the Ghost Wolf bite is so high, try to aim for a squishy hero before dropping your Earthbind Totem > Lightning Shield. It's a great burst your team can follow up on.
Abilities

Chain Heal (Q) – The burst healing may not be the highest, but the fact that you can heal up to three allies at once can be extremely useful, particularly during team fights. This ability can target minions, which can be helpful when attempting to stop an enemy from hard-pushing a lane. However, it will prioritize nearby Heroes over minions, so don’t worry about that when a fight breaks out. I'll also add that Chain Heal has a relatively long cooldown at 9 seconds, meaning early game your healing potential is rather weak during a prolonged team fight.

Lightning Shield (W) – The name is a bit misleading, as the ability doesn’t actually provide a shield by default. However, it does provide a fair amount of AoE damage, and is usually most effective when placed on a Warrior who can dive into the enemy back line and cause havoc. It will also help take down merc camps quickly, and can even be used on your Earthbind Totem if you so choose. Be aware that Lightning Shield is mana hungry and shouldn't be used just because. Use it when you know the person affected by it will be able to damage the opposition.

Earthbind Totem (E) – This is your only form of crowd control, and with its long cooldown, it needs to be used wisely. The Totem can function as an offensive tool, as you can place it down to slow enemies attempting to retreat. Of course, it can serve a defensive purpose as well, slowing down the advance of the opposing front line as they attempt to engage on your team. Keep in mind the short casting range as you don’t want to put yourself in a bad position just trying to get your Totem in place. It's also useful that if you are retreating, to place the Totem down and then cast Storm Shield on it so that it damages any enemies trying to reach you.
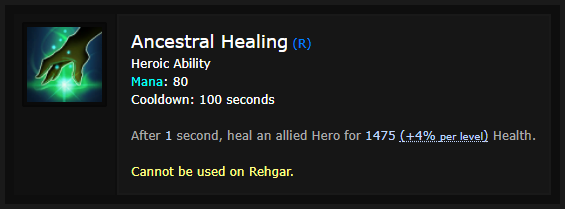
Ancestral Healing (R) – The healing provided by this Heroic is an exceptionally large amount, and using it on time, on the correct target, will be the biggest marker of whether or not you play Rehgar successfully. Be mindful of the 1 second delay; use the ability too early, and you wasted a large portion of your strongest heal. Use it too late, and your ally will die before the ability goes off, putting it back on a 10 second cooldown. While there is a delay, it is not a channel, so you are still free to move and use other abilities during that time.

Bloodlust (R) – This used to be the less popular Heroic choice for Rehgar, as the incredible healing from Ancestral Healing is usually too good to pass up. However, if you're with a basic attack heavy composition Bloodlust is the way to go. Just make sure the enemies can’t easily disengage from a fight, because if they can, a significant portion of Bloodlust’s duration will be wasted simply attempting to catch up to your prey. Despite that, 40% extra attack speed and 30% movement for your entire team is incredible. If you also factor in 30% of the basic attack damage is returned as health, it's an enormous bump to group-wide healing.
Talents

Level 1: Colossal Totem
A lot of Rehgar's potential stems from the use of his Totem. Whether engaging in a fight or needing to run away, his Totem and its slow provides a great deal of utility. Having the ability to cast it from further away thanks to Colossal Totem, while granting it a larger radius (50%) allows Rehgar to use his Totem earlier and late game, really cause problems for the opposition.
Level 4: Healing Totem
During a team fight and when Chain Heal is on cooldown, Healing Totem is invaluable. Providing AOE healing to all those in its radius and healing for 2% of their maximum health per second, it's a fantastic heal over time. Just be sure to place the totem where it won't be killed easily.
Variable: Feral Heart is a fantastic talent when on Battlegrounds that require sustain. Sitting in Ghost Wolf form to regenerate health and mana before diving back in is invaluable and in all honesty, you should spend most of your time in Ghost Wolf form until your healing is needed.
Level 7: Cleanse
Cleanse is an amazing talent especially if you're against a CC heavy team. Whether it's Malfurion or ETC, it'll allow you to break an ally out. It's a must-have talent against most compositions.
Variable: Totemic Projection allows you to reactivate your totem, moving it a second time. It's brilliant over the course of a fight as they'll often move. Later on, it pairs exceptionally well with Earth Grasp Totem to effectively snare someone twice.
Level 10: Ancestral Healing
Even though you can't cast it on yourself, Ancestral Healing is still the best clutch heal in the game. It will save someones life and allow your team to continue to fight, or to escape if needed. Used on a Tank such as Muradin, it can allow your team to snowball when the enemy team are weak.
Level 13: Earth Shield
Earth Shield provides an ally affected by Lightning Shield a shield worth 15% of their maximum health. It's significant and will help reduce the amount of healing you need to do. Even though Lightning Shield doesn't last long, this mitigate really helps your front-line fighters and if timed right, can mitigate a fair amount of incoming burst.
Variable: Similarly to the Ancestral Healing variable, take Earth Living Enchant if you need more output. Any enemies below 50% health affected by Chain Heal receive a heal over time for 5 seconds.
Level 16: Earthgrasp Totem
Being able to slow enemies affected by Earthbind Totem by 90% is incredibly and effectively puts a stop to enemy movement. Considering you can also move Earthbind Totem by pressing E again, Earthgrasp Totem is a must in team fights.
Variable: Rising Storm allows you to deal good damage, pairs with Chain Reaction (if you take it) and also works really well with Earth Shield.
Level 20: Rewind
Providing Rehgar with two heals, two lightning shields and two totems, Rewind is a no-brainer. In a pinch you can trigger it to easily snowball the opposition while your ability to back-to-back heal is incredible. It also means that thanks to Chain Heal, your team gets double the sustain while preserving your Ancestral Healing.
Variable: Storm Shield provides a large amount of shielding for Rehgar and all those around him. Lasting 3 seconds and granting a shield based on 20% of his team's maximum health, it's a considerable amount of mitigation - especially if used during Bloodlust.
Matchups
These Hero Threat Levels (1 being lowest threat and 10 being highest threat) are to help you determine which enemy Heroes can give you a headache. For the Heroes listed here, take extra care as they're particularly dangerous for Rehgar.
Hero
Threat
Illidan: His mobility and evades make him a challenge for Rehgar. His damage and if he uses an elite will also leave you in trouble.
9/10
Kerrigan: Staying out of her range is important because if she catches you with Primal Grasp > Impaling Blades you're going to take a huge amount of damage.
8/10
Murky: Octograb, plus pufferfish, will essentially kill you. In a 1 v 1 Murky wins if he gets the drop on you and he can comfortably avoid your Totem.
8/10
Nova: Nova loves to target Rehgar. If you are not full health and you are alone, you are in jeopardy. Try to always stay near allies and keep your Totem ready to block her.
9/10
Tracer: You can't hit her, she can avoid your totem and you can't outrun her. In the open field she'll kill you every time.
10/10
The Butcher: His charge, Lamb to the Slaughter or self heal can rip you up in seconds. Even if you use your Totem or ultimate, a good Butcher will have saved his Lamb to the Slaughter to ensure he can finish you off. Keep your distance!
9/10
Thrall: If he gets the drop on you with his root, you're going to take huge damage. Fortunately even if you are rooted, you can at least try to slow him or shield yourself.
6/10
Valla: Her Vault makes her tough to land your attacks and her sustain damage can cause real problems, especially with the extended reach of Hunger Arrow. Fortunately she's squishy so if she gets caught in your Totem.
7/10
Zeratul: He is much like Nova, only he kills you quicker. Be nervous if he's in the enemy team.
9/10
Tips
These Hero Threat Levels (1 being lowest threat and 10 being highest threat) are to help you determine which enemy Heroes can give you a headache. For the Heroes listed here, take extra care as they're particularly dangerous for Rehgar.
1. You can use Lightning Shield on your Earthbind Totem to have it act as a point of damage. It's great for clearing lanes.
2. If you take Lightning Bond you can cast Lightning Shield on your Totem and receive Lightning Shield for yourself. Clearing lanes and camps just got twice as good.
3. Save your Ancestral Healing for a warrior rather than a squishy target (unless they're about to die)- it'll help your team more as your Chain Heal can keep most squishy Heroes alive.
4. Remember to use Lightning Shield on an ally that's on the front-line. You want the lightning to be doing as much damage as possible.
5. You should regularly be switching in and out of Ghost Wolf in the event you need to escape or reposition quickly.
6. Earthbind Totem has a small range but it's brilliant for blocking players as they try to escape - use Ghost Wolf to run in front of them before planting it.
7. When in Ghost Wolf form, you can attack players once. This always critically hits and is good for finishing off a Hero who is trying to escape.
8. If you have taken it, try to use Bloodlust when your team is in amongst the enemy for maximum impact and to ensure the enemy team can't immediately escape.
9. During any team fight, try to save Storm Shield for when your team is about to enter combat. Use it too early and it'll vanish without helping your team.
10. Remember that you cannot cast Ancestral Healing on yourself. If you're low health, back off and wait for your Chain Heal.
11. It's best to use Storm Shield a few moments after a team fight starts as that's the time when most players cast all their abilities.
To read the latest guides, news, and features you can visit our Heroes of the Storm Game Page.
